Entity Framework Core Power Tools In ASP.NET Core Web API
| EF Core - DB First - .Net Core

Hi 🙋♂️, Now that you're here, let's learn something 👆 and don't forget to connect 👇
In this article we are going to learn the EF Core Power Tools basically the new version of EF Core is pretty simple to use like the Entity Data model which we are already used in .NET Framework and this EF Core Power tool helps in the development process. Let’s go deep into this.
What is EF Core Power Tools?
EF Core Power Tools is the most powerful extension. It provides a lot of options like Reverse Engineer to generate the Entity classes-based database tables and also to generate the Model Diagram. It also helps with the Migration of Existing Scripts which were developed by using the Code First Approach. EF Core Power Tools has an option to generate the DataContext Diagram and relation between the entity classes in a graphical view.
How does this tool help me?
With this tool, we can take an existing Database and perform a Reverse Engineer, which means generating all classes from your existing database.
What is Reverse Engineer in EF Core — Power Tools?
Reverse Engineer acts like Entity Data Model, where it generates the tables of our database as Entity Classes in the code and also Db Context class bases upon our Database.
Link to Download -> EF Core Power Tools
Make Sure you have at least Visual Studio 2017 installed on your machine to work with EF Core.
After downloading, Click, and install. But don’t forget to restart Visual Studio to complete the installation
Create a Project -> Open Visual Studio there you will find an option called Create a new project -> Click on that
Select ASP.NET Core Web Application -> Click on the Next button.
Give the Project Name and click on Create.
Select the version of ASP.NET Core 3.1 along with API and click on Create.
A sample project with API Structure will be created.
Right Click on Project there you will find an option installed, EF Core Power Tools
Step 1
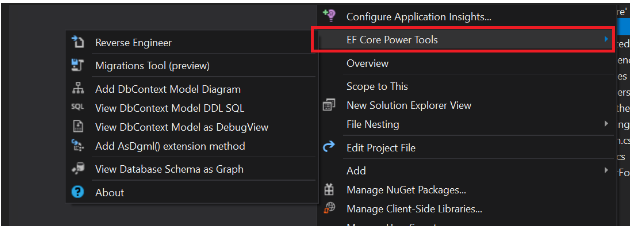
Click on Reverse Engineer there you will find the Db Connection Option.
Step 2
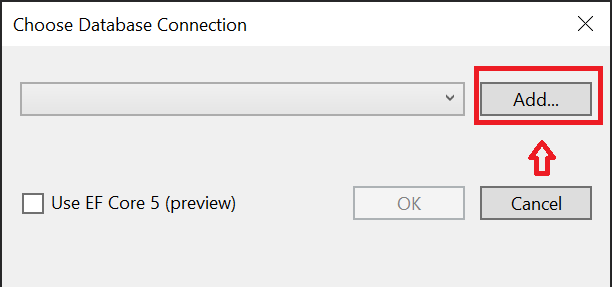
Click on Add to connect with Database Server
Step 3
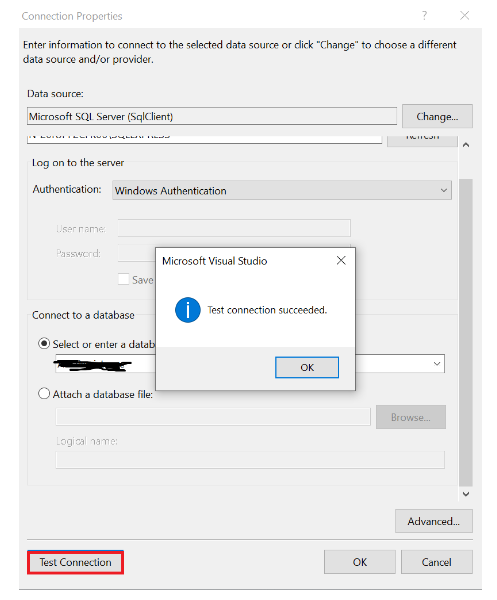
Provide the SQL Server name in the Text Box and find whether you are using Windows or SQL Authentication.
Select the Database Under the Select or enter the database.
Click on Test Connection to check where the connection is configured in a proper way.
Click on OK.
Step 4
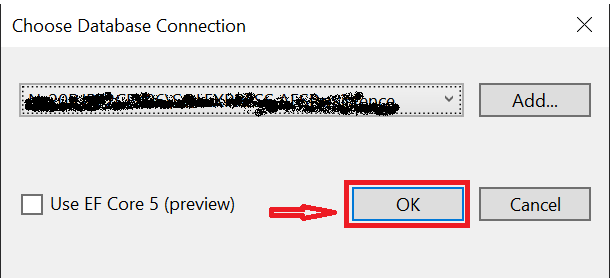
That’s done! The Connection with the database will show in the selected DropDown -> Click on OK.
Step 5
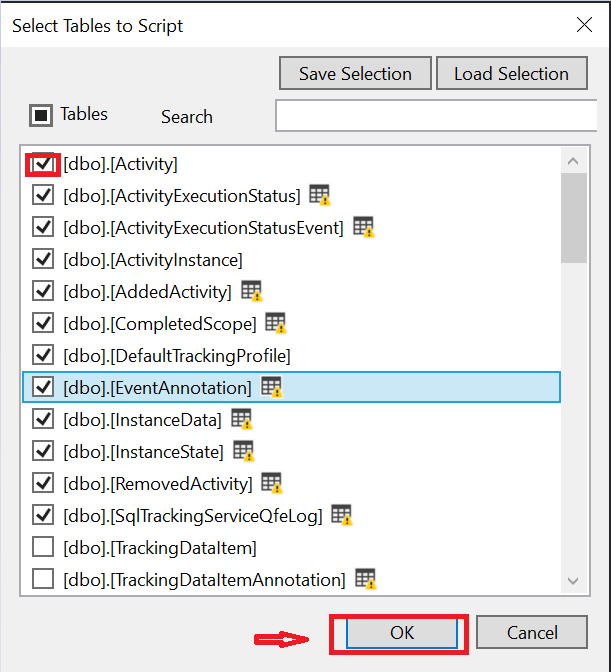
Select the Tables which you want to include in your project and click on OK.
Step 6
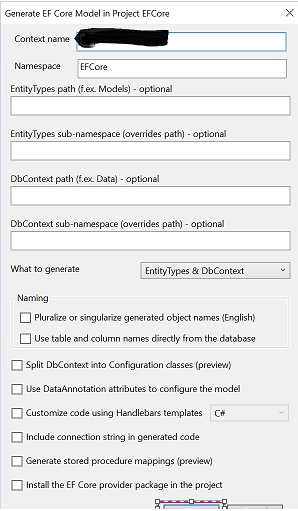
By default, it will add the DB name as Context name you can change if you want, and also it will select Entitytypes & DbContext by default
-> Click on OK.
You will get a confirmation, as shown below.
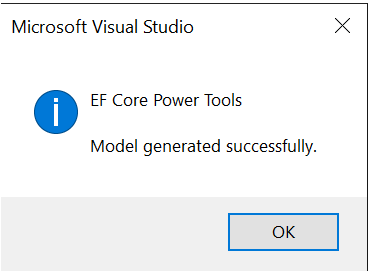
Finally… The model Classes with Db Context have been generated automatically. This is how simple it is to work with EF Core Power Tools.
Summary
In this article, learned about the integration and usage of EF Core Power Tools in ASP.NET Core Web API.
Thank you for reading, please let me know your questions, thoughts, or feedback in the comments section. I appreciate your feedback and encouragement. Please find the source code here
Support me

Keep Learning…!


